As promised... a tutorial on my Chocolate Mannequins from my daughter's
Paris Themed Birthday Party. They turned out so pretty! And can be used for virtually anything from party decorations to wedding favors.

Supplies:
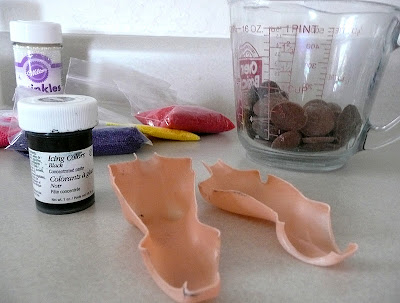
- an inexpensive, plastic Barbie with no inside mechanisms so that she can easily be taken apart and cut in half. We found ours at the dollar store, which was perfect because of how thin the plastic on Barbie's torso was.
-Wilton chocolate candy melts
-Sprinkles and sugars of assorted colors
-If you would like to color your own sugars, food coloring and coarse sugars will be your friend.
-assorted tissue paper
-Colored ribbons
-Clear Plastic cups
-Sucker Sticks
For the mold: Take your Barbie apart until you're left with only her torso. Then cut along the sides of her torso with a pair of scissors so that you have a "mold" for the back and front of your mannequin.
Melt the candy melts in the microwave in 15 second intervals until completely smooth and melted. Use a Wilton squeeze bottle (which can be found at Hobby Lobby) and pour or squeeze the melted candy chocolate into the barbie torso cavities. Apply a sucker stick vertically to the lower half of only one of the cavities. Let both sides set completely. Carefully pop each side out of its mold. Then add melted chocolate melts to "glue" the pieces together and set in the fridge for 10 minutes. Also, for any gaps between the seams, pipe on extra melted chocolate.
Brush on a little light corn syrup to make a dress shape line on the front and back, then dip them into colored sprinkles. Once set up and dry, punch a small hole in the bottom center of a plastic cup and carefully push sucker stick into the hole.
Fold your choice of tissue paper vertically, until it is the height of the cup. Gather and pinch the top of the tissue and wrap it around the waist so that the ends touch or over-lap in the back. Secure with tape and cover with a coordinating ribbon.


